First Light with the Takahashi FSQ-106EDX4, Paramount MyT, and Atik 16200 Mono
After waiting so long for the equipment, I finally had all the pieces of the puzzle. Miraculously, the first Saturday (July 14, 2018) after finally getting the last piece (another counterweight) it was clear with a fairly new moon. I packed up the family truckster with my stuff (I really should take pictures along the way!) and headed out to the observatory.
As could be expected, the evening was not without problems. As I mentioned, this was the first time that I actually had a chance to get everything working together. There were several pieces that I could have managed to get by without, but not having enough counterweight wasn’t one of them. Don’t get me wrong - this isn’t a sob story. I did manage to scrape together something, and learned a LOT my first evening out with the new gear. I made several mistakes, but my setup routine is getting better. This post will go through the good, the bad, and the ugly of my first light.
Setting up
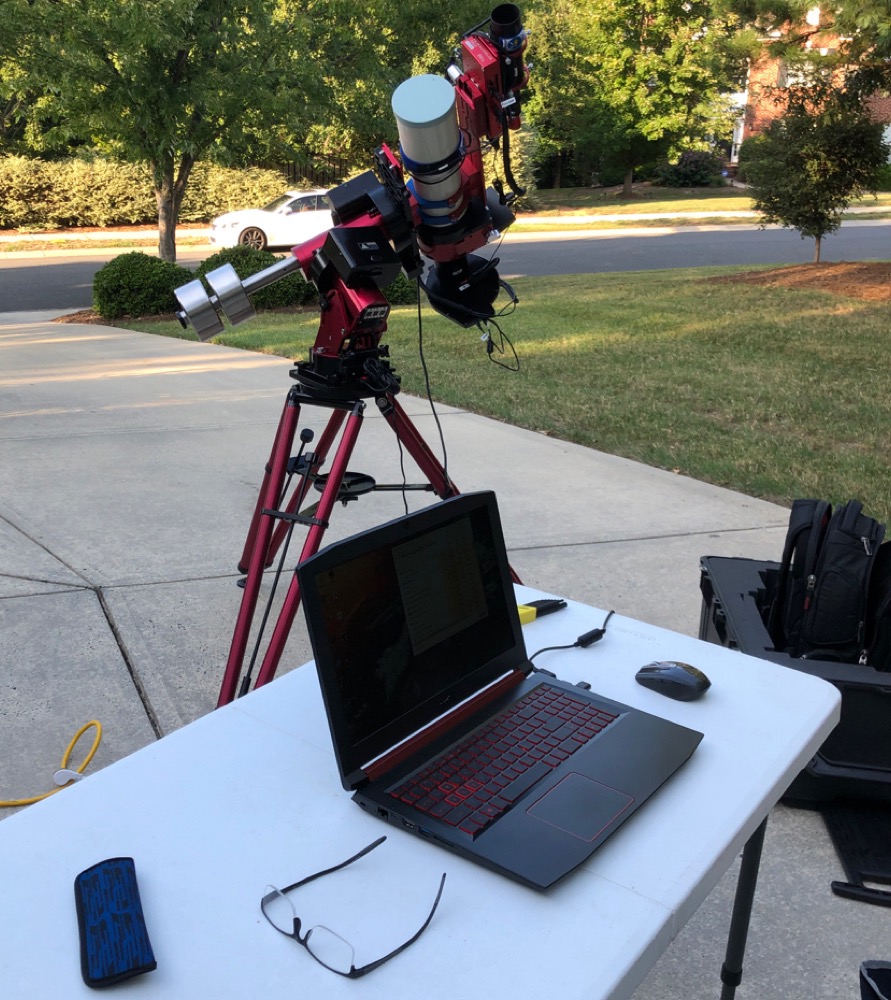
On my first night out I wanted to make sure that I got there early to avoid setting up in the dark. While I neglected to take a picture of the rig in action, I did during a dry-run at home, afterwards (“dry run” because it got cloudy). I plan to post some more rig pictures in the future, including cable management, software, laptop specs, etc. For now, this is the best that I have. I had plenty of time to get everything assembled, balanced, polar aligned, and start imaging. Well, that was the theory. What I’d like to do is go through the high-level details of what I was trying to do, and what I did wrong, so perhaps you can learn from my mistakes.
What is north, anyway?
The purpose of a compass is to determine where the north magnetic pole is. Magnetic north is not the same as true north. I know this, but still messed it up. That mistake is what caused the most grief as the evening went on. This was a major screwup. I used a compass to find north, and used the calculated 8° magnetic declination (or deviation, whichever you prefer) to set up the tripod (ok, technically, they call it a portable pier, but it looks more like a tripod. Strangely, their “tripod” looks more like a portable pier. Go figure). I had it centered pointing at my 8° deviation from magnetic north. The problem? My deviation was the wrong way. So I started out 16° off. Moron. At least I had the right hemisphere. Obviously, I didn’t realize this error until much later in the evening…
Level the tripod
How hard can this be, right? Initially this part went well. The tripod has one of those bubble levels built in, as does the mount. I also took a torpedo level with me as a sanity check. The Paramount Portable Pier is a great tripod- a threaded bolt goes down each leg, giving a few inches of travel each. You can adjust this from above, so you can actually see the level indicator as you go, as oppose to turn, stand up and look, rinse/repeat. There is also a course adjustment mechanism, but I haven’t used that so can’t comment.
The tripod “feet” are actually articulated, so they help sit flat on a somewhat undulating surfaces. On the bottom of each foot are (were) three little screws which help even more- it’s like each tripod foot has a tripod of its own. Since I had been playing around with the setup indoors I had removed them, but they will probably go on now that I have the whole rig.
I got the legs fully extened, and the tripod facing (what I thought was) true north. I put on the actual mount. What I learned here is that no matter how far the legs are extended, and how level the tripod is, once you put on ~80lbs of gear (mount, imaging train, counterweights) the tripod will settle. Not sag, not droop, but the legs will splay out a little more. Luckly, I caught this and was able to quickly re-level.
This is where a good torpedo level comes in. I got this one from Amazon, but you can get one from Lowe’s, Home Depot, etc. Just make sure that it’s set up like the one that I got so you can see the level indicator from any angle. Also make sure that you get one that doesn’t have magnets protruding from the bottom. If it isn’t flush don’t trust it. Your mount will vary, but I was able to put it across the mount/tripod connecting bolts along each plane.
Assemble the rest
The rest of the things really go together in a pretty straightforward manner. While I had a pre-designed order, I do plan to change it up a bit.
How I set up for astrophotography
The prerequisite is that you know the deviation for true north for your location (mine is about 8°). I suggest coming up with a list of your own- follow it exactly, every time. When you tear down, make sure that you put things in their place. Nothing worse than traveling to a dark site and forgetting that one crucial thing.
- Level and align the tripod so it is facing true north. Your manufacturer may indicate if a specific leg should be in front, or if the gap should be
- Secure the mount on tripod (if the mount & tripod are light enough, steps 1 & 2 can be combined)
- Attach the counterweight bar to the mount
- Put the counterweights on the counterweight bar and secure the counterweight retaining bolt - at this point, you are better off weight heavy than top heavy.
- OPTIONAL: at this point, you may choose to do a preliminary one-star polar alignment. See below, then come back. Or read it later, it’s your mount after all.
- Secure the telescope to the mount. It is a good idea to put it in from the front of the dovetail clamp if you can. This allows you to put in retaining bolts at the front of your dovetail bar, lessening the chance for a very expensive “oopsie”
- Assemble the rest of your rig (camera, guide equipment, etc)
- Verify level and correct if necessary
- Balance the rig. Quick tip: once you are balanced, mark where things “intersect”. This makes it MUCH easier to rebalance next time. Note that some mounts will recommend an “east heavy”, while others are fine being balanced
- Turn things on, but make sure that you aren’t pointing anywhere near the sun if it is still up, especially without a cap on the OTA - you will immediately destroy your camera
At this point you are ready to start with your polar alignment routine. This will really be dependent on your mount.
Notes on leveling: Don’t solely rely on an integrated bubble level unless you have verified that it works. If you use a torpedo level, level north/south and east/west, then flip the level around 180° and make sure that it doesn’t change. If it does, get a new level!
Learning the Ropes
I am using TheSkyX pro as my interface. At a high level, setting up is pretty straightforward, once you know how to do it. Getting started from scratch is a little daunting. Luckily I had a seasoned expert at my disposal ![]() . To get aligned, you make a t-point model, which takes images of the sky in various positions, plate solves to determine where it is, and calculates how you are aligned. Needless to say, to do this you need to be in focus. It actually took quite a while to get the autofocus to work. The steps on the NiteCrawler are teeny - you need to make sure that you are configured correctly so it isn’t moving 10 steps at a time. Because of the USB2 on the Atik camera download speed is pretty slow, too– a full image takes ~20 seconds. Binning 4x4 got us dialed in a lot better, and a lot faster. After the t-point model is created, you can calculate how far off from polar alignment. Remember my first problem? This is where it reared its ugly head. It took several iterations to get even close.
. To get aligned, you make a t-point model, which takes images of the sky in various positions, plate solves to determine where it is, and calculates how you are aligned. Needless to say, to do this you need to be in focus. It actually took quite a while to get the autofocus to work. The steps on the NiteCrawler are teeny - you need to make sure that you are configured correctly so it isn’t moving 10 steps at a time. Because of the USB2 on the Atik camera download speed is pretty slow, too– a full image takes ~20 seconds. Binning 4x4 got us dialed in a lot better, and a lot faster. After the t-point model is created, you can calculate how far off from polar alignment. Remember my first problem? This is where it reared its ugly head. It took several iterations to get even close.
We finally decided that we were close enough. I wasn’t leaving without an image!
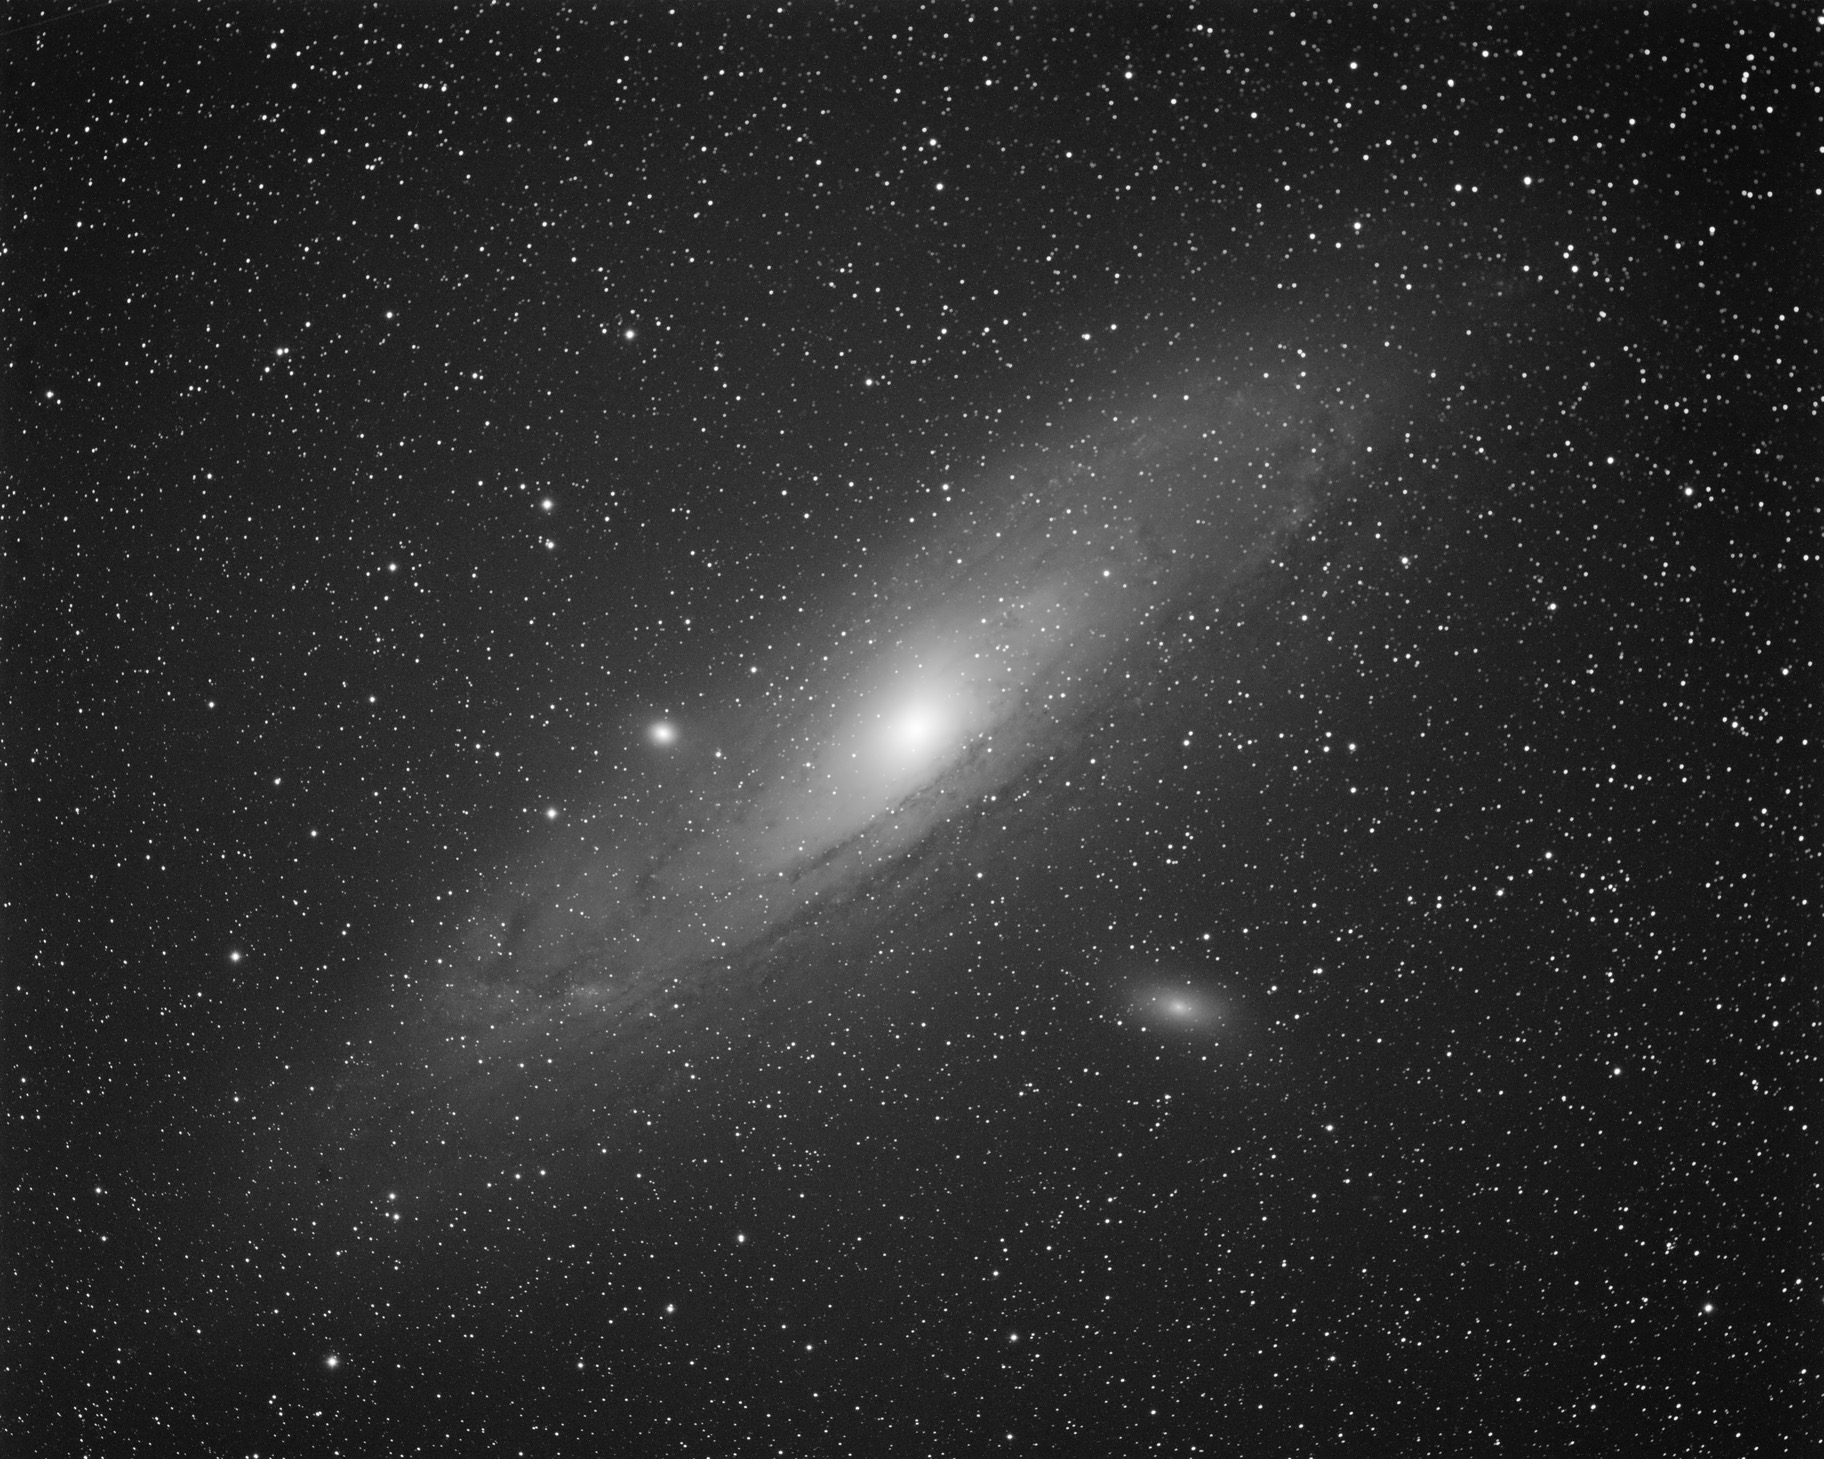
Pay Dirt
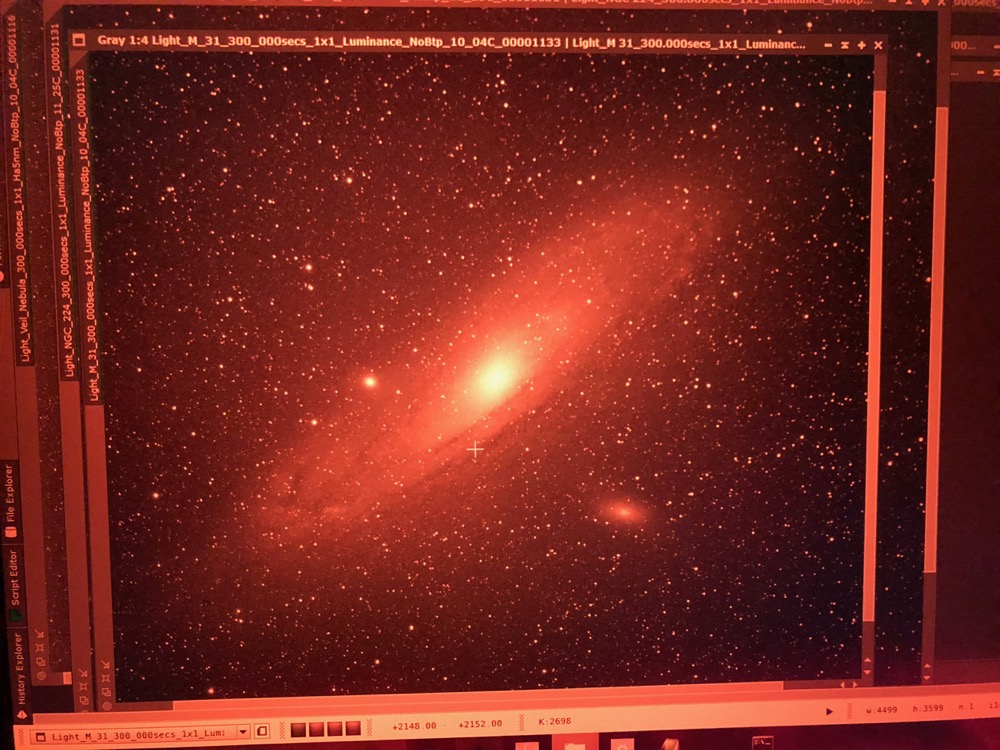
Troubles aside, this, to me, was a very successful first light. I was able to grab a couple of shots, shown below, with some image capture details and links to astrobin. These are both single-frame, unguided images.
Andromeda Galaxy (M31)
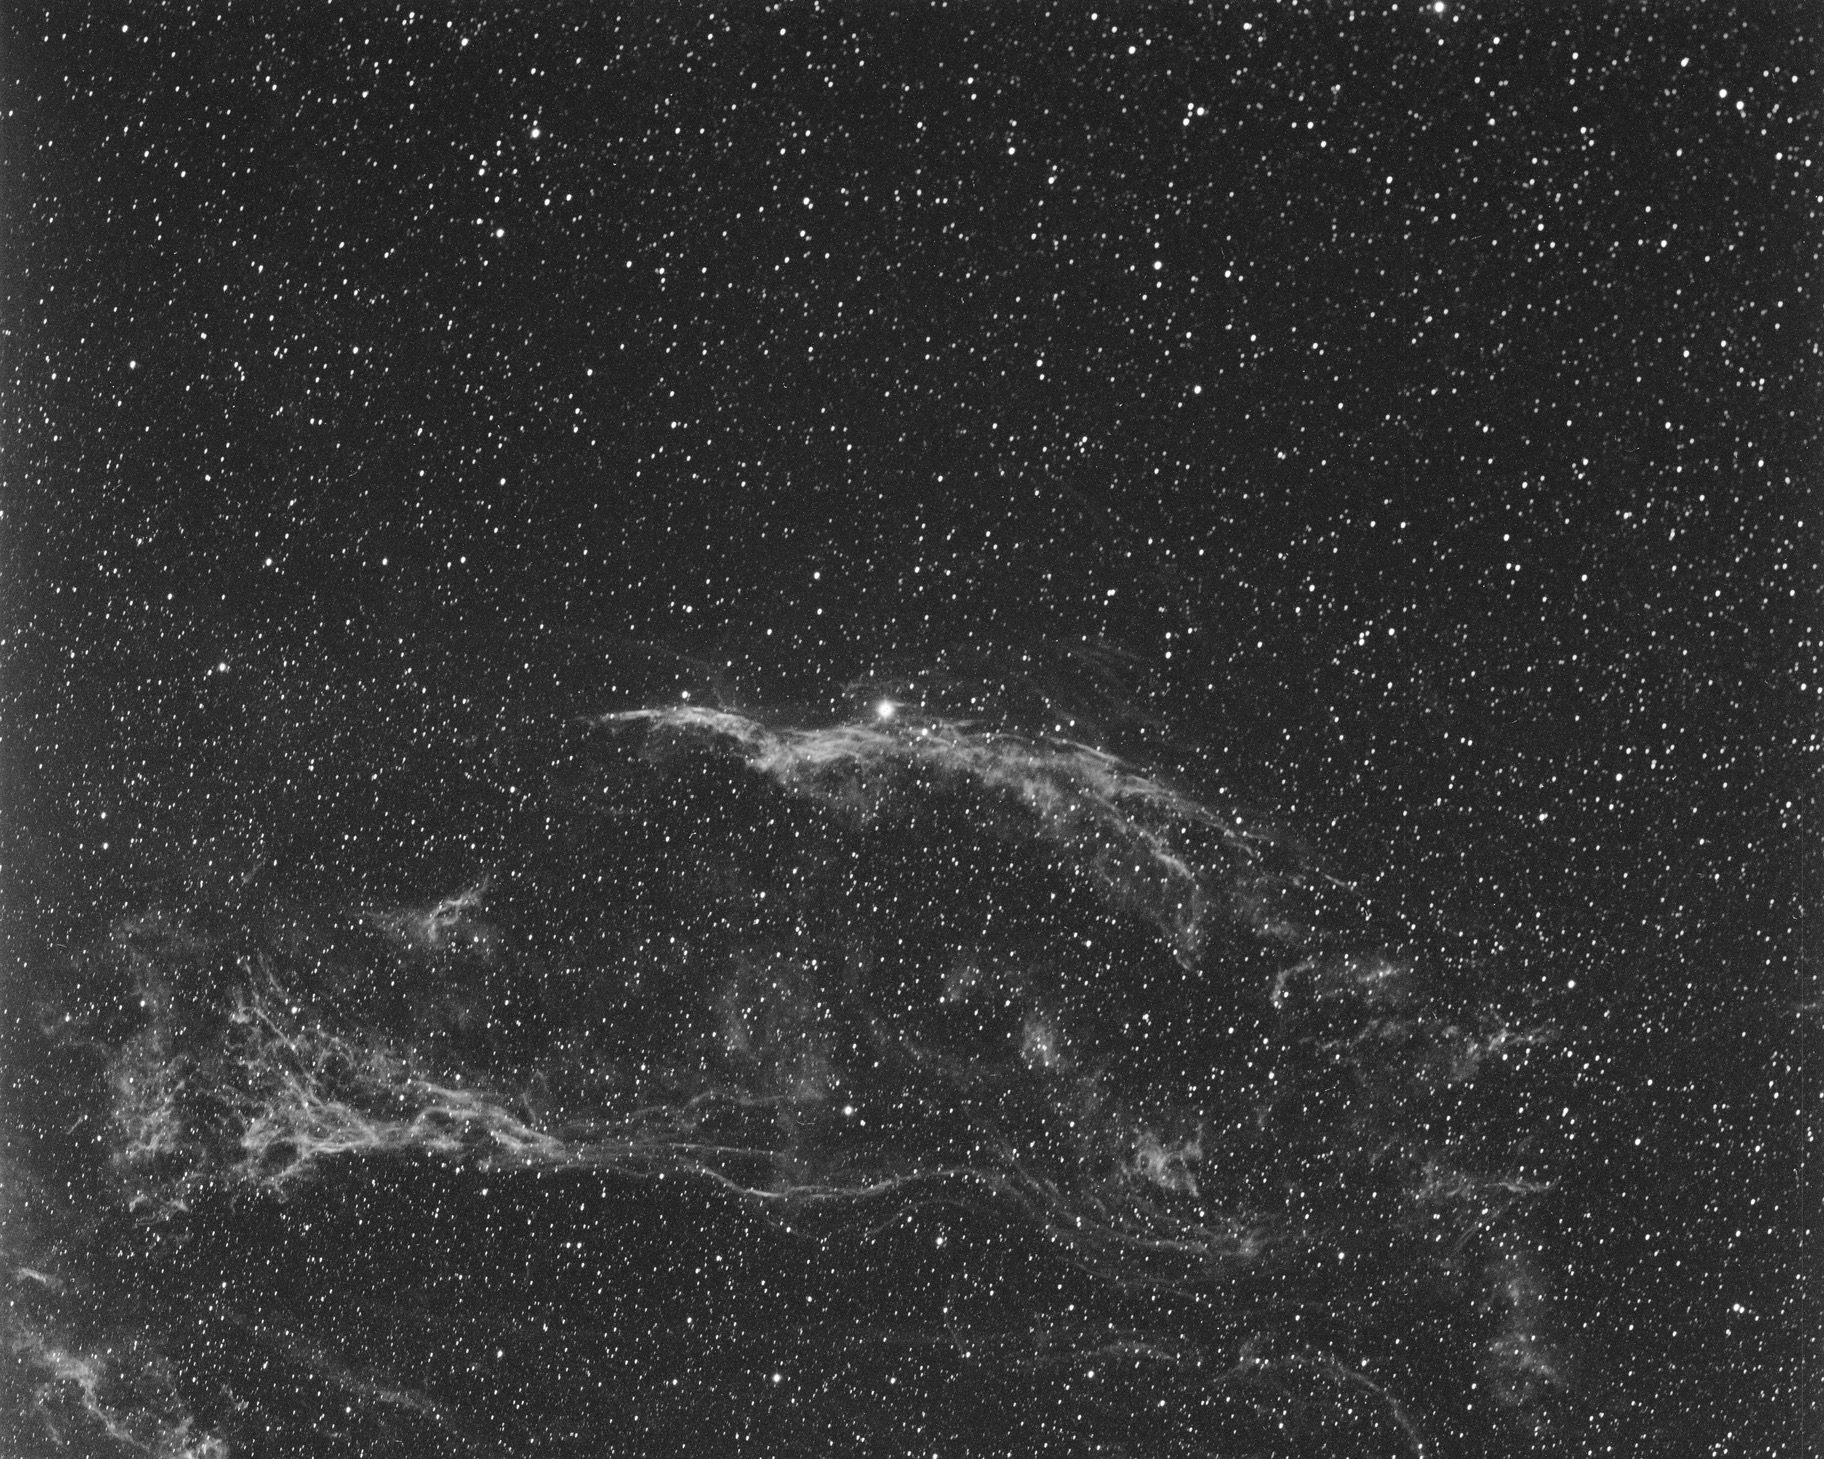
Veil Nebula (NGC 6960)